Inside a chip, code like this compares a PIN. Disturb the chip at exactly that moment and the comparison can go the wrong way: a wrong PIN, accepted. Not breaking the chip, just making it wrong once. That is fault injection.
3 WAYS
Three ways to glitch a chip
VoltageDip the supply. Easy, but coarse
EM pulseA strong pulse from a coil
LaserFocused light. Most precise in place and time
The usual tools are voltage glitches, EM pulses and lasers. A laser can be focused to a tiny spot, so it gives the finest control over where and when.
PRO LAB
In a professional lab
~$250,000
Until recently this was lab work. Ledger Donjon, the security team at Ledger, puts their laser setup at around $250,000.
RAYV LITE
RayV Lite brings it to ~$500
A modified OpenFlexure 3D-printed microscope
An off-the-shelf 532 nm laser module fed in from the side
Raspberry Pi for imaging and motion, an FPGA for timing
Researchers at NetSPI published the whole design, which makes it possible to build one yourself.
MY BUILD
What I am building
Body
Printed on a Bambu Lab A1 (23 parts)
Eyes
20x objective + NoIR camera
Hands
Three motors for XYZ
Brain
Raspberry Pi 4 + Arty S7
Light
532 nm laser
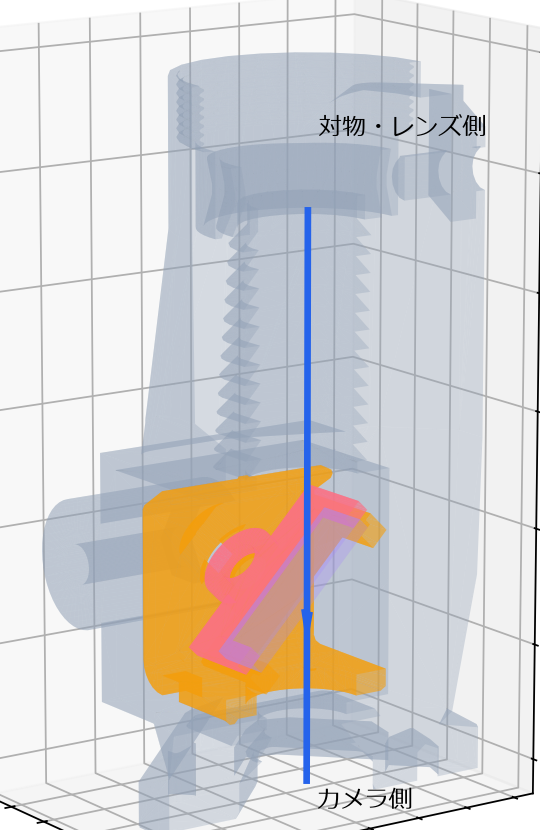
The drawing is a section of the optics tube: a tilted beamsplitter sits inside, and light passes from the objective down to the camera.
HOW IT WORKS
A microscope you can aim through
See inside the chip with infrared
Move to the target with the motors
Fire only at the moment the FPGA picks
The laser enters from the side, turns up at the beamsplitter, and the objective focuses it onto the chip. Light from the chip passes back down to the camera.
LESSONS
What went wrong
01A reinforcement wall I added was blocking the light path
02The laser that arrived did not match the drawing; I measured it and redid the holder
03One glass plate, shipping about 4x the part price
The light-path check only covered a small region, so a 1 mm wall slipped through. The laser (10 mm tip, 12 mm body) did not match the original design, so I measured it and refit the holder. Optics shipping hurts.
MEASURED HOLDER
A holder fitted to the measured laser
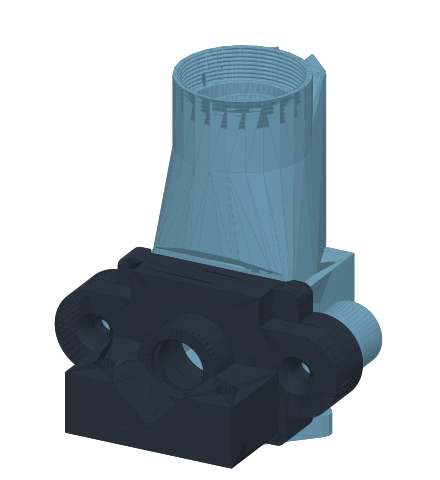
I dropped the long original tube for a short mount sized to the measured laser, held by an O-ring and two screws.
Final fit checks and a full imaging test are still to do.
DEFENSE
How defenders respond
DetectOn-chip sensors for light and voltage anomalies
Check twiceRun critical checks twice and stop on mismatch
Secure elementKeep keys in a hardened, externally evaluated chip
The shared idea: assume any device in someone’s hands will eventually be taken apart.
SAFETY
Before you try this
Lasers destroy eyes. Green modules can leak invisible infrared. Use an enclosure, an interlock and wavelength-rated eyewear
Only ever target your own hardware
This rig stays without a powered laser until the enclosure and interlock are done.